Home

Getting Organized for School Lunches, Part 1

Leave a comment

back to school (2).jpgStep 1: Make a List

It’s back to school time in our community, and with a new school year comes a new rhythm to my day. This year, my oldest two children are in Kindergarten and 3rd grade, leaving me (mostly) at home with only my 2-year-old. It’s a big shift from having all three at home over the summer!

Since the older two have complex food allergies, feeding challenges, and other special needs, I’m working on streamlining the process of packing lunches for them. Mornings are super crazy, and cutesy, Pinterest-worthy lunches are just not a priority around here. I’m just trying to get some food packed between hollering “Get dressed!” “Don’t forget to comb your hair!” and  “Stop chasing your brother around the house like a maniac!”

The first step is to “Make a List” – a list of lunchbox-worthy items they’ll actually eat. School lunches are not the place to experiment with new foods. Lunch time is so short at school, and my boys will ignore anything that is not an easy-to-eat, preferred food. Allergen-free food is too expensive and time-consuming to be wasted, so familiar foods it is, even if that means the variety is pretty limited.

I’ve been doing this for a couple of years now for my oldest, so here’s his list:

  • Hot Entrees: hot dogs, leftover chicken, potato hash, “mac & cheeze,” burgers
  • Cold Entrees: tuna salad, Sunbutter and jelly sandwich, yogurt with jelly, cracker sandwiches
  • Starchy Sides: potato chips, Rice Rollers, Supercookies, homemade no-bake cookie
  • Fruits & Veggies: applesauce pouch, apple slices, dried mango, raisins, carrots, celery, avocado

For my middle son, the list is more restricted:

  • Hot Entrees: hot dogs
  • Cold Entrees: Sunbutter and jelly sandwich, cracker sandwiches, leftover “desperation” waffles
  • Starchy Sides: potato chips, Rice Rollers, Supercookies, crackers
  • Fruits and Veggies: applesauce pouch, raisins, fruit leather

I try to pack 3-4 items each day, depending on the serving size of each item. Hot items go in a thermos, of course. (Pro tip: Pre-heat the thermos by filling it with boiling water and letting it sit for 5-10 minutes before filling it with hot food.)

My next post will be Step 2: Streamlining the Process. Stay tuned!

Crock Pot “Dump” Meals

Leave a comment

I’m convinced that this is the answer to all my problems: Crock Pot “Dump” Meals. Ok, not really the answer to ALL my problems, but a really valuable tool for simplifying life a bit. “Dump” meals are the ones where you dump a bunch of ingredients into the crock pot, turn it on, and 6-8 hours later, voila! Food – hot and ready to eat! Here’s the key – most dump recipes, also called “Freezer-to-Crockpot” meals, can be prepped ahead of time and frozen in freezer container or bag, without cooking them first.

We’ve talked a lot here about doing batch cooking and using the freezer to store prepared food for future meals, but this is even easier. All that is required is to put raw food in freezer bag, label, and place it in the freezer. And pulling a bag out of the freezer and dump the contents into the crockpot? Easiest thing ever!

*Pro tip – freeze the food in a shape that fits into your crockpot or else allow several hours for the package to thaw before cooking it.

Here’s a super simple recipe to get you started:

Honey-Rosemary Chicken

Place in a freezer bag:

4 chicken breasts, cut into bite size pieces

1/4 cup balsamic vinegar

1/4 cup honey

1/4 cup olive oil

3 tbs rosemary, chopped

1 tsp salt

When you’re ready to cook:

Empty contents of freezer bag into the crockpot and cook on low for 6-8 hours.

It really doesn’t get much easier than that, people! Serve it with salad or steamed veggies on the side, whatever you like, and enjoy the fact that dinner cooked itself!

Tuesday Tips – Kosher for Passover Marshmallows

Leave a comment

It’s Passover for those who celebrate, and that means that the grocery stores are stocking special “Kosher for Passover” items. This is a boon to those of us who must avoid corn, as one of the “rules” for Passover is usually interpreted to mean that corn is forbidden in Passover foods. My favorite thing to stock up on at this time of year is corn-free marshmallows, and when I see them, I always stock up. This year there were two kinds at the store: one coated in toasted coconut, and one without. I’m not sure who was more excited to see them, me or the kids! I’m sure the other customers in the store thought it was odd to see an entire family jumping up and down with excitement over marshmallows.

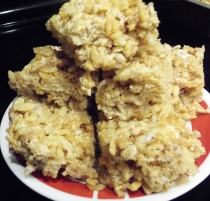
Of course, I can’t see marshmallows and not think about those gooey marshmallow cereal treats from my childhood. They were always a staple at bake sales in high school. It turns out that they are still every bit as yummy as now as they were 20 years ago! And they’re still super simple to make. Add these to the list of easy snacks to send to school!


Corn-Free Marshmallow Cereal Treats100_0174

1 10 oz bag of marshmallows

1/4 Cup of coconut oil

6 cups of crisp rice cereal (we use Erewhon Crispy Brown Rice cereal)


1. Melt the marshmallows and coconut oil together. This can be done on the stovetop or in the microwave.

2. Stir in the cereal until it is thoroughly coated.

3. Press into an oiled cake pan and let it cool completely. (If you’re in a hurry, stick it in the freezer for 15 minutes or so!)

4. Try not to devour the whole thing in one sitting – you’ll get a tummyache!

A word to the wise: I tried making this recipe with both kinds of marshmallows. It worked great with the ones coated in powdered sugar, but the ones with the toasted coconut were too dry. Next time I use that kind, I think I’ll try decreasing the cereal by a cup, and increasing the oil a little. If you try it, leave a comment and let me know how it comes out.

Older Entries